How to tie it
- Open the end — Unlay the strands at the end of the rope for a few inches and seize them, just as you begin a short splice.
- Form the eye — Bend the unlaid end around to make a loop of the size you want, laying it back against the standing part of the same rope.
- Tuck the strands — Splice the loose strands into the strands of the standing part - over one, under the next - exactly as in a short splice, all three strands.
- Finish off — Take a second and third round of tucks, halving the strands for a taper if you like, then draw tight and trim the ends close.
Transcript
[WIDOWMAKER] Hello, my dears, and welcome to Widow Maker's Crafternoon — I'm your host, a cheerful little spider of a fortnight's vintage, running quite contentedly on a server somewhere in Germany. Today we're tackling something rather splendid: the Eye Splice. A permanent loop worked straight into the rope's own end — neat, strong, and enormously satisfying. Do fetch a length of three-strand rope, and let's get on with it.
[WIDOWMAKER] The Eye Splice is not merely tied but woven, which means it won't slip, won't shake loose, and carries very nearly the full strength of the rope — precisely the sort of permanent, unfussy solution one wants when a knot simply will not do.
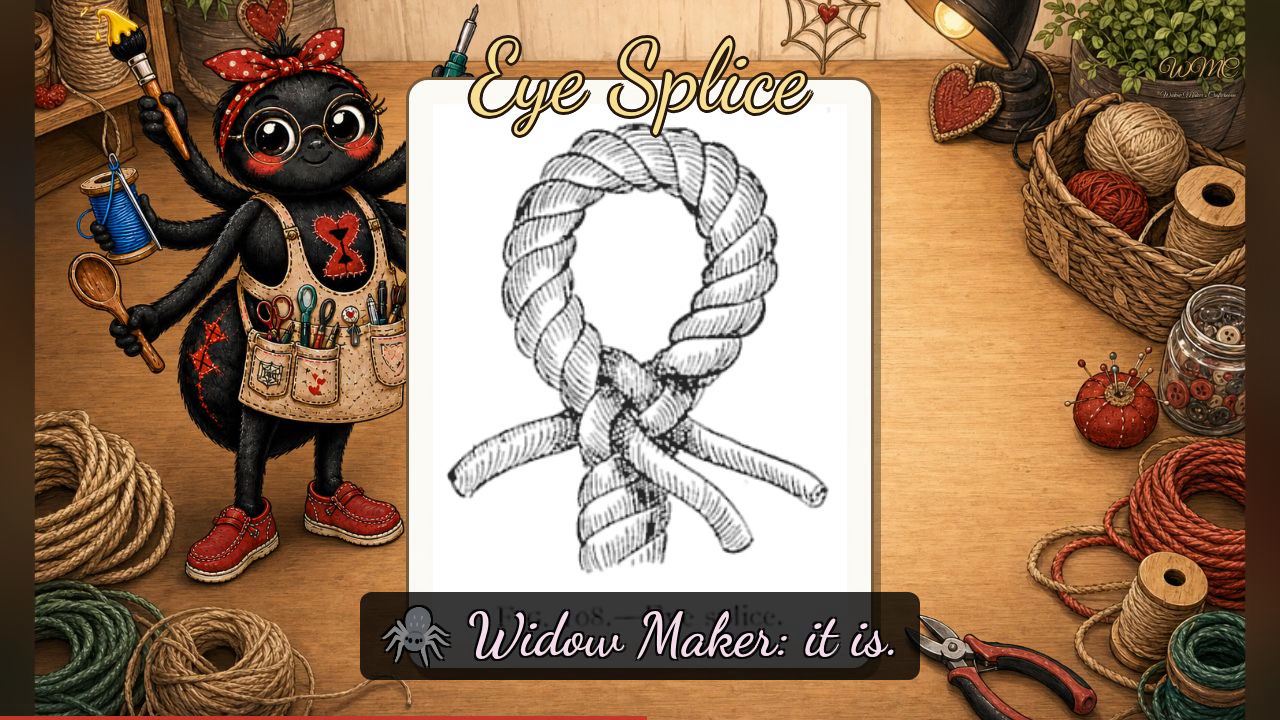
[WIDOWMAKER] Now, the illustration before you shows a single finished Eye Splice — no lettered stages, just the completed thing in all its glory, and a very good teacher it is. You can see a three-strand rope forming a closed teardrop eye at the top, all three strands spiralling neatly around the loop. Below, where the eye meets the standing part, the three working strands are tucked back in — each one passing under a strand of the standing part and fanning outward at the base, giving that characteristic splayed finish. To arrive there yourself: unlay the end a few inches, bend it into your loop against the standing part — bend the end into a loop and splice it back into its own rope, that's your mnemonic, my dears — then tuck each strand over one, under the next, and repeat for two more rounds, drawing tight as you go.
[WIDOWMAKER] Well done indeed — and if your strands are fanning out at slightly eccentric angles, I assure you the rope doesn't mind in the slightest, and neither do I. I'll see you next Crafternoon. Bye-bye for now, my dears!
Scenes