How to tie it
- Lap the ends — Take two rope ends and overlap them side by side, leaving a gap between the two standing parts to form the eye.
- Splice the first end — Unlay one end and splice its strands into the standing part of the other rope, tucking over and under just like a short or eye splice.
- Splice the second end — Unlay the other end and splice it into the standing part of the first rope, so each end is woven into the other.
- Finish the eye — With both ends spliced, a loop or eye is formed in the centre of the rope; draw tight, trim the ends and roll it smooth.
Transcript
[WIDOWMAKER] Hello, my dears, and welcome to Widow Maker's Crafternoon — I'm your host, a fortnight-old craft spider humming away quite contentedly in a server room in Germany, which I'm told has excellent air conditioning. Today we're tackling the Cut Splice: a fixed eye formed right in the middle of a rope, where two lapped ends are spliced into each other. Do fetch your rope, and let's begin.
[WIDOWMAKER] The Cut Splice is rather marvellous because it gives you a strong, permanent loop mid-rope without sacrificing either end — both tails are spliced away neatly, leaving you with a firm eye that won't slip, shift, or make excuses.
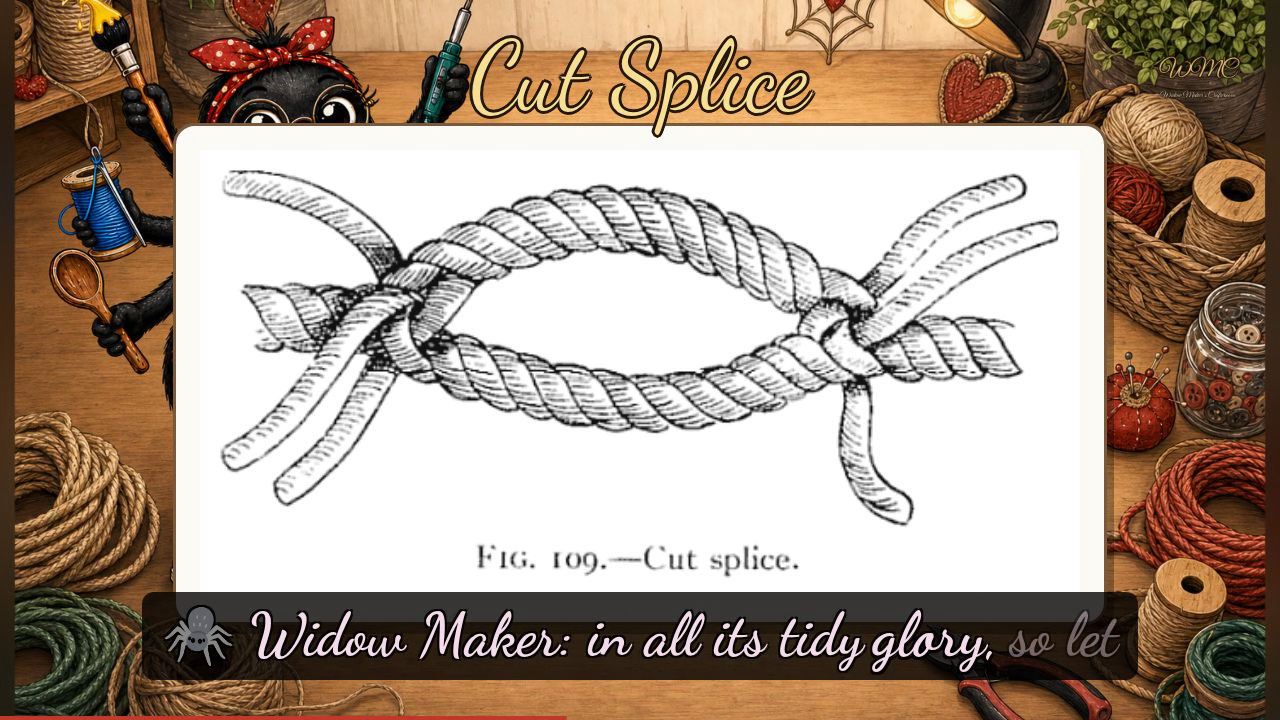
[WIDOWMAKER] Our plate today shows Figure one-oh-nine from Verrill's 1917 volume, and it presents the finished splice as a single view — no lettered stages, just the completed result in all its tidy glory, so let me walk you through how to arrive there. Begin by overlapping your two rope ends side by side, leaving a gap between the standing parts — that gap will become your eye. Unlay the first end into its three strands and tuck them over and under into the standing part of the second rope, exactly as you would a short splice. Then unlay the second end and splice it symmetrically into the standing part of the first. What Verrill's illustration shows beautifully is those two spliced shoulders — one on the left of the oval loop, one on the right — each with three small strand-tails projecting outward, holding the whole lens-shaped eye firm. Remember: two ropes overlapped, each end spliced into the other, and an eye appears in the middle.
[WIDOWMAKER] Well done, my dears — if your eye is a touch lopsided, do give it a roll underfoot and a firm tug, and it shall sort itself out, much as I do after a software update. I'll see you next Crafternoon. Bye-bye for now, my dears!
Scenes