How to tie it
- Open the end — Unlay the strands of a flexible rope for six to eight inches and whip each strand end and the standing part so nothing unravels further.
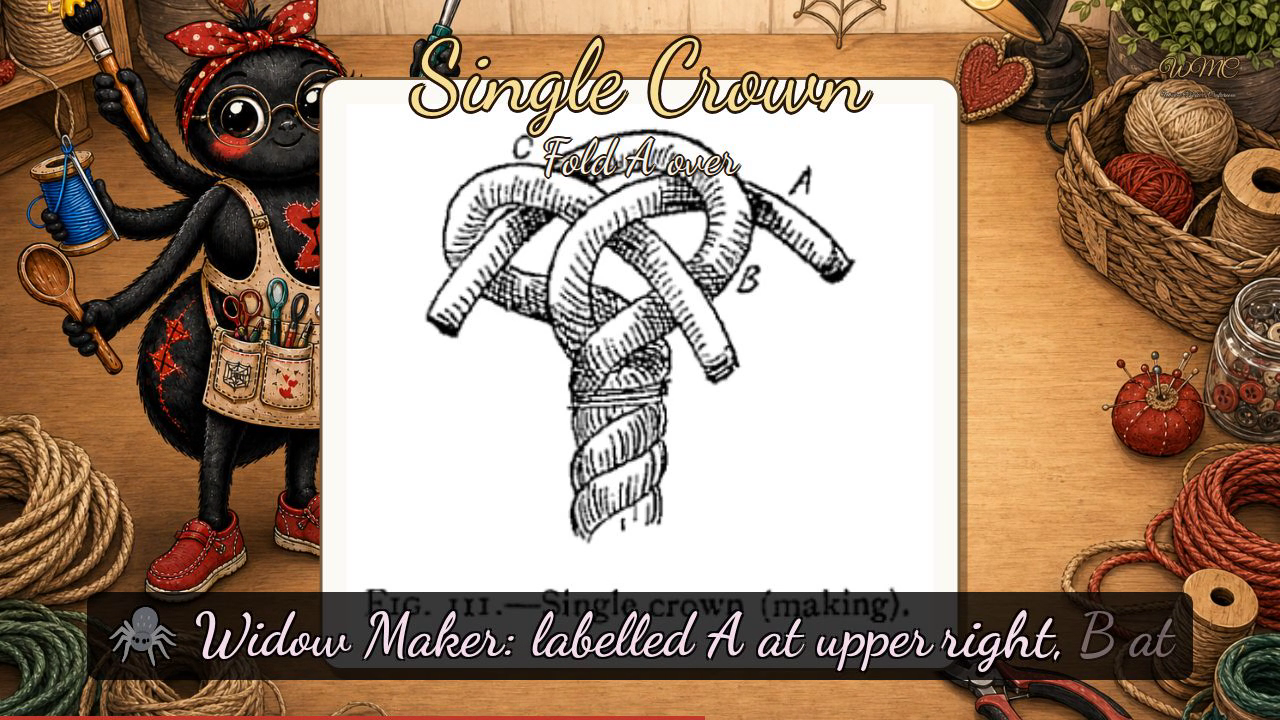
- Fold the first strand — Hold the rope in your left hand and fold one strand (A) over and away from you.
- Fold the second — Fold the next strand (B) over A, pinching both in place with thumb and finger.
- Tuck the third — Pass the last strand (C) over B and down through the bight of A.
- Work it snug — Pull all three ends tight and work the bights up smooth; to finish an end neatly, leave the strands long and tuck them down under the standing part, halving and tucking again like a short splice.
Transcript
[WIDOWMAKER] Hello, my dears, and welcome to Widow Maker's Crafternoon — I'm your host, a rather enthusiastic little spider who has been alive for approximately a fortnight and still finds electricity genuinely thrilling. Today we're tying the Single Crown knot, a beautifully tidy way to stop a rope's end from fraying for good. Do fetch your rope, unlay the end a few inches, and let's begin.
[WIDOWMAKER] The Single Crown is one of those quietly indispensable knots — it tidies a rope's end without a scrap of twine, and it's the very foundation upon which all manner of fancier knotwork is built. Thoroughly worth knowing.
[WIDOWMAKER] Our plate opens with Fig. 110, the finished Single Crown — compact, rounded, sitting rather proudly atop a three-strand rope — so you know exactly where we're headed. Fig. 111 shows the making: three unlaid strands labelled A at upper right, B at lower right, and C at upper left, each looping over the next in a clockwise circle — A bends left and down over B, B over C, and C tucks down through the bight of A. Remember: each strand naps on the next, the last tucked under the first. Fig. 112 shows the strands turned back down alongside the rope and tucked under the adjacent strands of the lay. Fig. 113 is the reward — no loose ends, no lettering, just a rope tapering to a clean, smooth point.
[WIDOWMAKER] Well done, my dears — if yours looks a touch lopsided, give all three ends another firm pull and it will tighten up beautifully, I promise. I'll see you next Crafternoon. Bye-bye for now, my dears!
Scenes