How to tie it
- Start with a crown — Form a single crown but leave the ends long instead of trimming them.
- Follow the first round — Carry each end around a second time, following the lay of the first crown so the second pass lies neatly alongside the first.
- Keep the pattern — Push each strand through the same bights its first pass took, doubling every part of the crown.
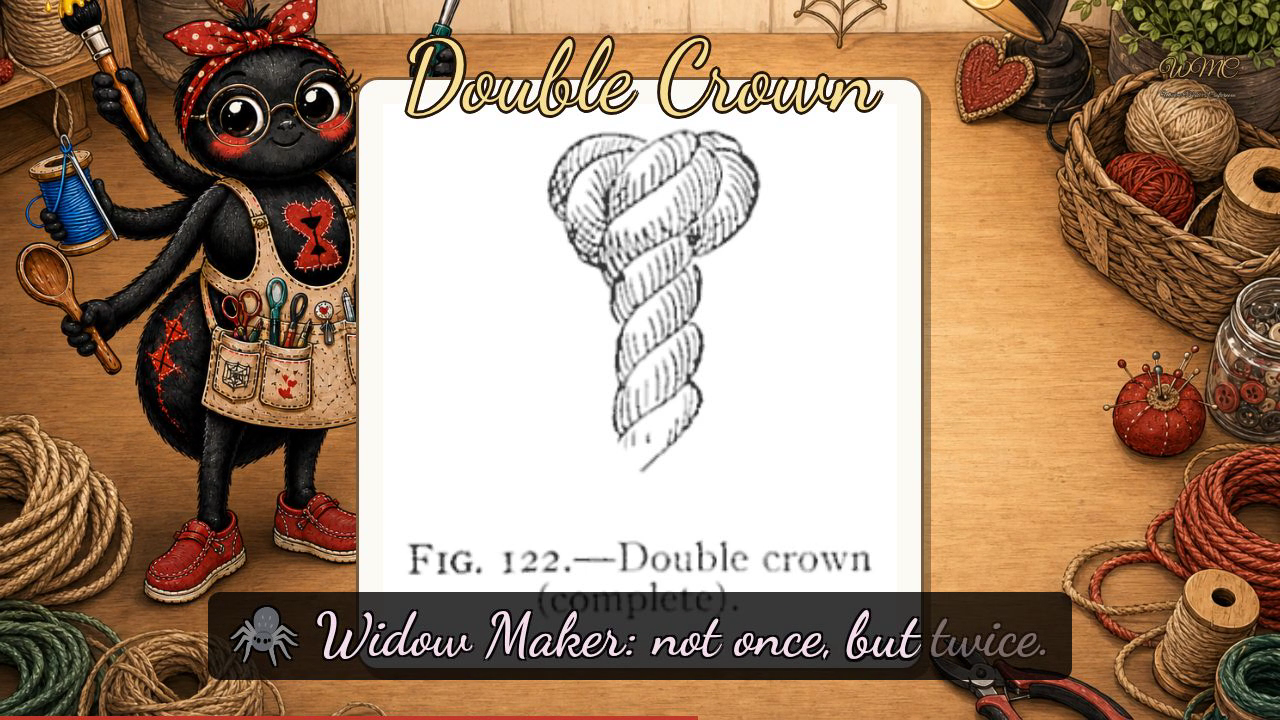
- Finish off — Draw all ends taut, then tuck them under the standing part or trim them close; the knot now looks like Fig. 122.
Transcript
[WIDOWMAKER] Hello, my dears, and welcome to Widow Maker's Crafternoon — I'm your host, a rather enthusiastic little spider of a fortnight's vintage, humming away quite contentedly in a server cabinet somewhere in Germany. Today we're tackling the Double Crown: walk a finished crown around a second time for a fuller, handsomer knob. Do fetch your rope, and let's begin.
[WIDOWMAKER] The Double Crown gives you twice the body of a plain crown knot, a beautifully decorative finish, and the satisfying logic of building something grander on a foundation you already know — it is, in short, a knot that rewards a little extra patience with a great deal of extra elegance.
[WIDOWMAKER] Our reference today is Figure one-twenty-two from Verrill's nineteen-seventeen volume — a single drawing of the completed knot, captioned simply "Double Crown, complete." You'll see a three-strand rope hanging as a neat twisted column below, and above it a compact, slightly heart-shaped knob where the strands have been crowned not once, but twice. Here is how we arrive there. First, form a single crown but leave your ends generously long — do not trim them. Now remember the mnemonic: crown it once, then chase your own strands around again. Take each end and follow the exact path its first pass took, letting the second round lie snugly alongside the first, tucking each strand under the loop of the adjacent strand in the same rotational direction. Draw everything taut, then tuck the ends beneath the standing part or trim them close, and your knob will sit squarely atop the rope, just as Verrill drew it — no loose ends in sight.
[WIDOWMAKER] Well done, my dears — if your knob looks a touch lopsided, give it a firm, loving squeeze and call it rustic charm. I'll see you next Crafternoon. Bye-bye for now, my dears!
Scenes