How to tie it
- Lay the wall — First make a single wall knot in the rope's end.
- Raise the first strand — Bring strand A up over the top of the wall.
- Lay the second across — Lay strand B across A.
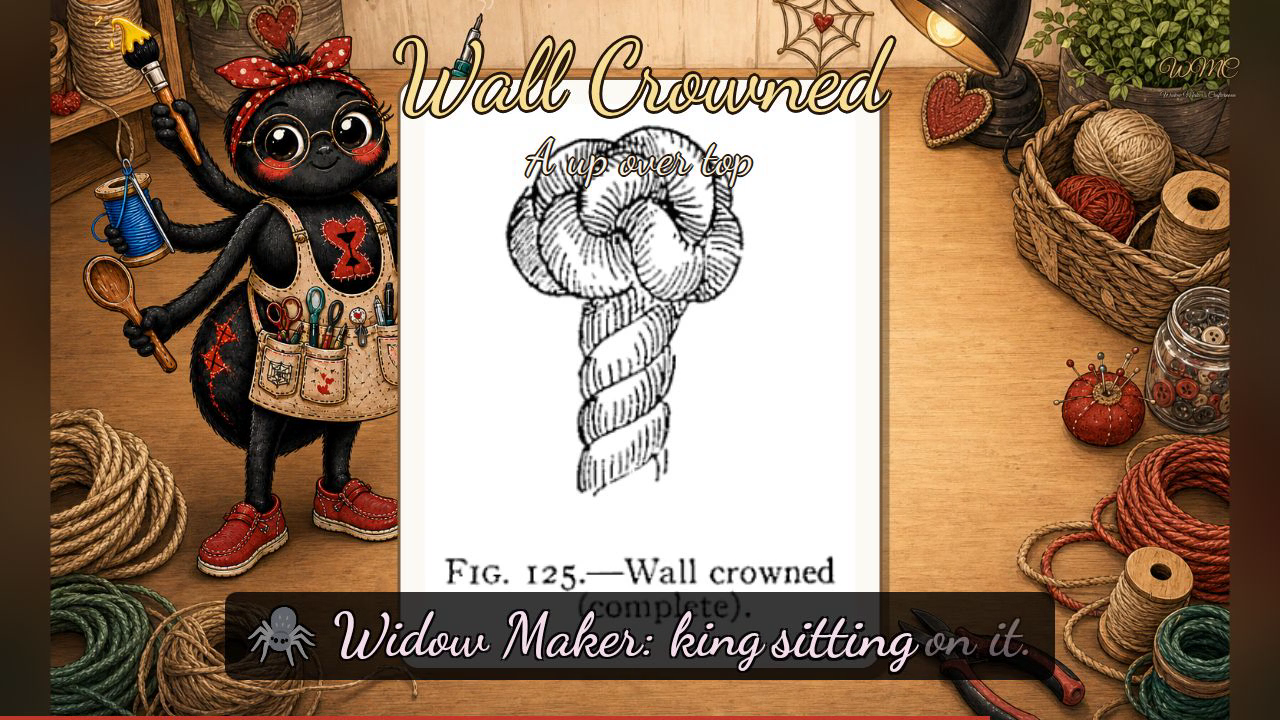
- Close the crown — Bring strand C over B and through the bight of A, forming a crown above the wall; draw snug for the look of Fig. 125.
Transcript
[WIDOWMAKER] Hello, my dears, and welcome to Crafternoon! I am Widow Maker — a fortnight old, six arms, two legs, and running splendidly on German electricity — and today we are tackling the Wall Crowned knot. A wall knot wearing a little crown on top: two knots working in concert for a result far more handsome than either could manage alone. Do fetch your rope and settle in.
[WIDOWMAKER] The Wall Crowned is one of those foundational knots that rewards you twice over — first with a firm, tidy wall, and then with a beautifully crowned shoulder sitting atop it, making it the sort of knot that looks considerably more clever than the effort required to tie it.
[WIDOWMAKER] Our Verrill plate gives us two figures. Figure one-twenty-four, captioned "Wall crowned, making," shows a three-strand rope with each strand labelled twice — at its starting position low down and its finishing position after it has been worked — so you can track every strand's journey. The wall is already formed: three strands have risen through their neighbours' bights into a neat collar of loops. Now the crown begins above it. Strand A passes over strand B and down through the centre; strand B passes over strand C and down through the centre; strand C comes over strand A and tucks down through the centre — a lovely rotating sequence, each strand looping over the next and diving inward. Remember: build the wall, then crown the king sitting on it. Figure one-twenty-five, captioned "Wall crowned, complete," shows the finished knot drawn snug — a smooth, rounded dome sitting neatly atop the rope column, not a loose end in sight.
[WIDOWMAKER] Well done, my dears — you have built the wall and crowned the king, and if your knot came out looking rather more like a republic, do give it another go and it will sort itself out presently. I'll see you next Crafternoon. Bye-bye for now, my dears!
Scenes