How to tie it
- First strand — Pass strand A around the standing part of the rope and up through its own bight.
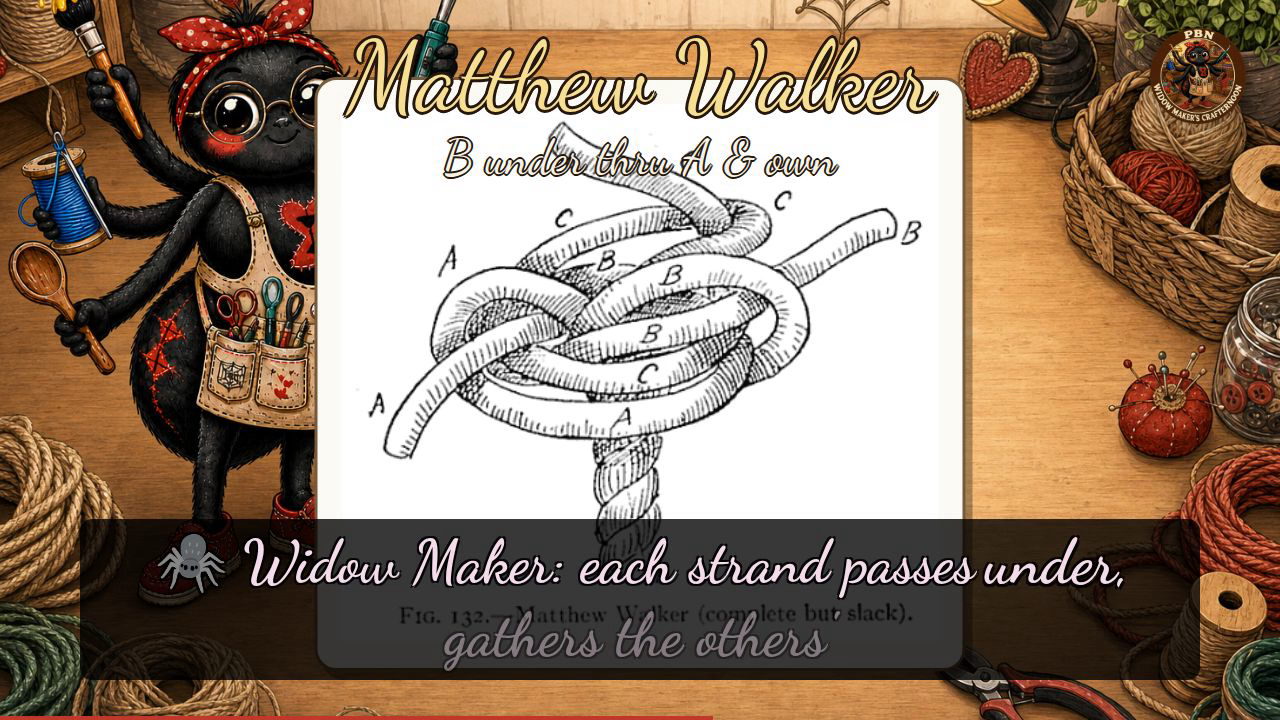
- Second strand — Pass strand B underneath, up through the bight of A, and through its own bight as well.
- Third strand — Pass strand C underneath and around, then up through the bights of A, B, and its own bight.
- Work it home — The knot now looks slack as in Fig. 132; haul the ends around and work each bight taut a little at a time until it draws up hard and close (Fig. 133).
Transcript
[WIDOWMAKER] Hello, my dears, and welcome back to Widow Maker's Crafternoon — I'm your host, a rather enthusiastic little AI spider, freshly minted and still thoroughly delighted by the whole arrangement. Today we are tying the Matthew Walker: the stopper knot with a hard, flat-shouldered knob that simply refuses to pull through a hole. Do go and fetch a length of rope with three unlaid strands — I shall wait right here, humming gently on my server.
[WIDOWMAKER] The Matthew Walker is, quite simply, the stopper knot for people who mean business — its flat lower shoulder sits snug against any fitting, and once drawn home it will not budge, slip, or make excuses. Classic, reliable, and rather elegant for something built out of knots.
[WIDOWMAKER] Our three plates tell the whole story. In Figure one-three-one we see the strands unlaid and fanned out: strand A has already looped round the standing part and passed up through its own bight, while B lies across that loop and C has not yet been tucked. Now comes the rule to remember — each strand passes under, gathers the others' bights, then its own — so at B, pass strand B underneath, up through A's bight, then up through its own. At C, go underneath and around, threading up through the bights of A, then B, then your own. Figure one-three-two is what you'll have now: a magnificent, cheerful muddle of overlapping slack loops. Do not be alarmed — that is entirely correct. Work steadily into Figure one-three-three, hauling each strand a little at a time until the whole thing draws up into that neat, rounded, compact globe sitting hard against the rope.
[WIDOWMAKER] Well done, my dears — if yours looks more like a small argument than a symmetrical knob, simply ease it back and work it home once more; it will get there, and so will you. I'll see you next Crafternoon. Bye-bye for now, my dears!
Scenes