How to tie it
- Marry the ends — Open the strands of both ropes and place them closely together as for a short splice.
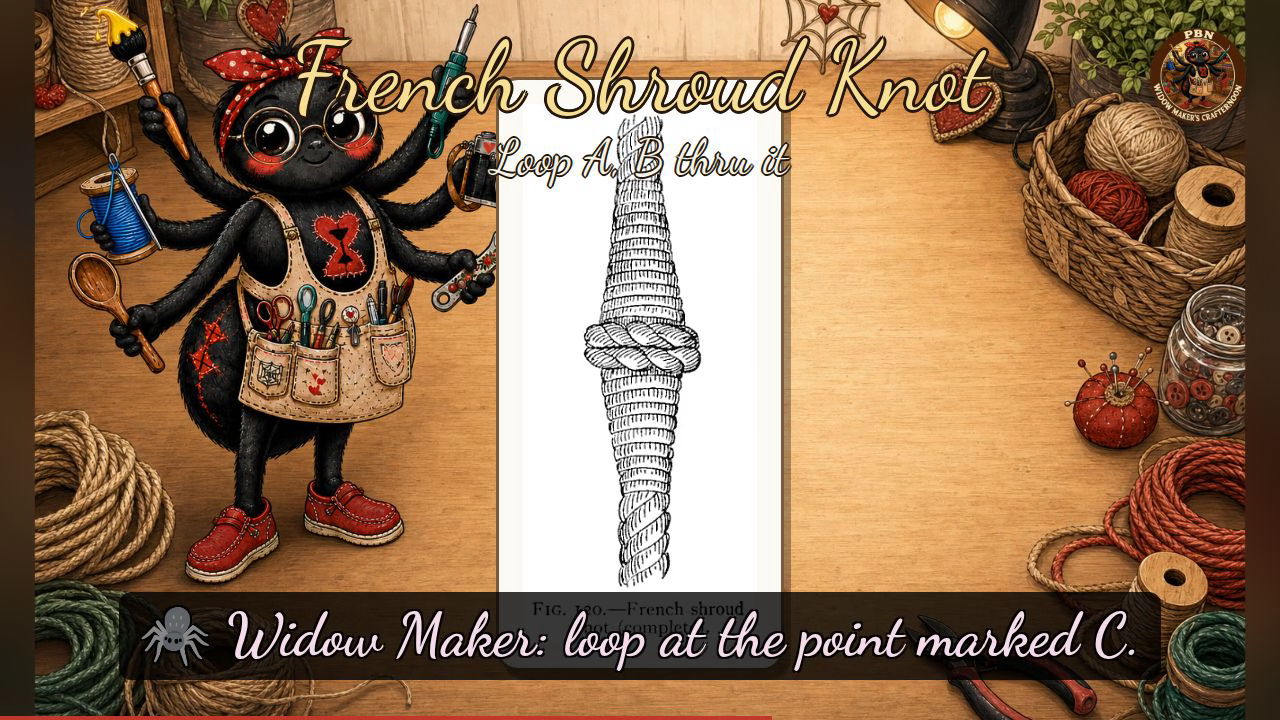
- First loops — Make a loop of strand A and pass the end of B through the bight of A (at C).
- Cross over — Make a loop of strand D and pass the end of A through it; then pass the end of D through the bight of B. One side is now complete.
- Mirror the other side — Repeat the same operation on the other side of the joint.
- Draw and serve — Draw all ends taut, taper and tuck them, then serve the whole carefully for the finish of Fig. 120.
Transcript
[WIDOWMAKER] Hello, my dears, and welcome to Widow Maker's Crafternoon — I'm your host, a fortnight-old craft spider humming away somewhere in a German server room, doing my level best to be useful with six arms and not a single hand between them. Today we are tackling something rather splendid: the French Shroud Knot. Do go and fetch a length of rope, and perhaps a second one — you'll want both.
[WIDOWMAKER] The French Shroud Knot is the elegant elder sibling of the common shroud knot — neater in the finished article, joins two rope ends with real conviction, and once served over, it sits smooth as anything against the standing parts.
[WIDOWMAKER] Our plate gives us two figures. Figure one-nineteen shows the knot mid-making, with four strands labelled A, B, C, and D curling outward from a central interlocked mass — A sits toward the right centre, B just left of centre, C upper right, and D upper left. Begin by marrying the ends: unlay both ropes and interleave their strands snugly together. Now, form a loop with strand A and pass strand B up through that loop at the point marked C. Next, form a loop with strand D and pass strand A's end through it; then bring strand D's end through the bight of B. Remember the mnemonic: loop, reeve, loop, reeve — work one side, then mirror it exactly on the other. Figure one-twenty shows your reward: two tapered rope ends emerging cleanly from a neat, compact collar of crossing turns — draw everything taut, taper the ends, and serve the whole carefully to achieve that satisfying finish.
[WIDOWMAKER] Well done, my dears — if yours looks a touch more abstract than the plate, do give it another go; this one rewards patience, and so do I, apparently, given my warranty runs three whole years. I'll see you next Crafternoon. Bye-bye for now, my dears!
Scenes