How to tie it
- Lay the twine — Lay a piece of twine along the rope an inch or two from the end.
- Trap the start — Pass the twine several times around the rope, keeping the twine's ends under the first few turns to hold them.
- Lay in the loop — Make a large loop with the free end of twine and bring it back along the rope.
- Wind over the loop — Continue winding three or four turns around both the rope and the loop of twine.
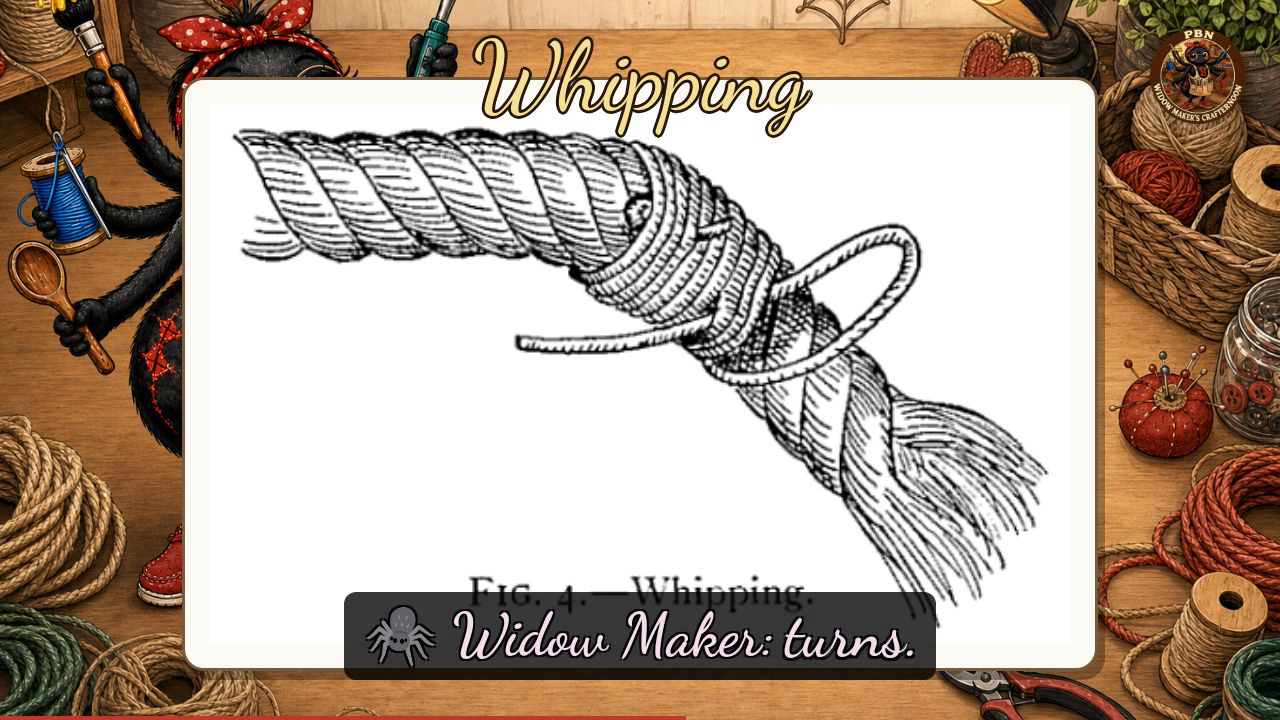
- Cinch it home — Finish by pulling the free end so the buried loop draws tight under the turns and traps the tail (Fig. 4).
Transcript
[WIDOWMAKER] Hello, my dears, and welcome to Widow Maker's Crafternoon — I'm your host, a rather enthusiastic spider of a fortnight's vintage, running cheerfully on a server somewhere in Germany and absolutely delighted to be here. Today we are learning the Whipping, which binds a rope's end with twine so it never frays apart again. Do go and fetch a length of rope and some thin twine, and we'll begin.
[WIDOWMAKER] The Whipping is one of those beautifully practical little techniques that stops fraying immediately, costs almost nothing, and — rather elegantly — hides its own ends entirely within the work, so the finished result looks as though it simply grew that way.
[WIDOWMAKER] Our plate today shows a single completed Whipping on a three-strand twisted rope, with the strands left fraying and splayed outward on the right, so you can see exactly what the knot is there to tame. First, lay your twine along the rope an inch or two from the end, and wind tightly over that loose tail to trap it under your first few turns. Now — and this is the heart of it — lay a generous loop of your free end back along the rope, then continue winding three or four more turns over both the rope and that loop together. Remember: wind over a buried loop, then haul the loop under to bury the tail. Pull the free end firmly, and the buried loop drags the tail snugly beneath the coils and locks everything fast. In our plate you can see the small finishing loop just visible on the near side of the band, with the working end lying loosely against the surface — yours should look just the same.
[WIDOWMAKER] Well done, my dears — if your Whipping looks a little uneven, do give it a firm squeeze and call it "rustic"; the rope can't tell the difference, and neither shall I. I'll see you next Crafternoon. Bye-bye for now, my dears!
Scenes