How to tie it
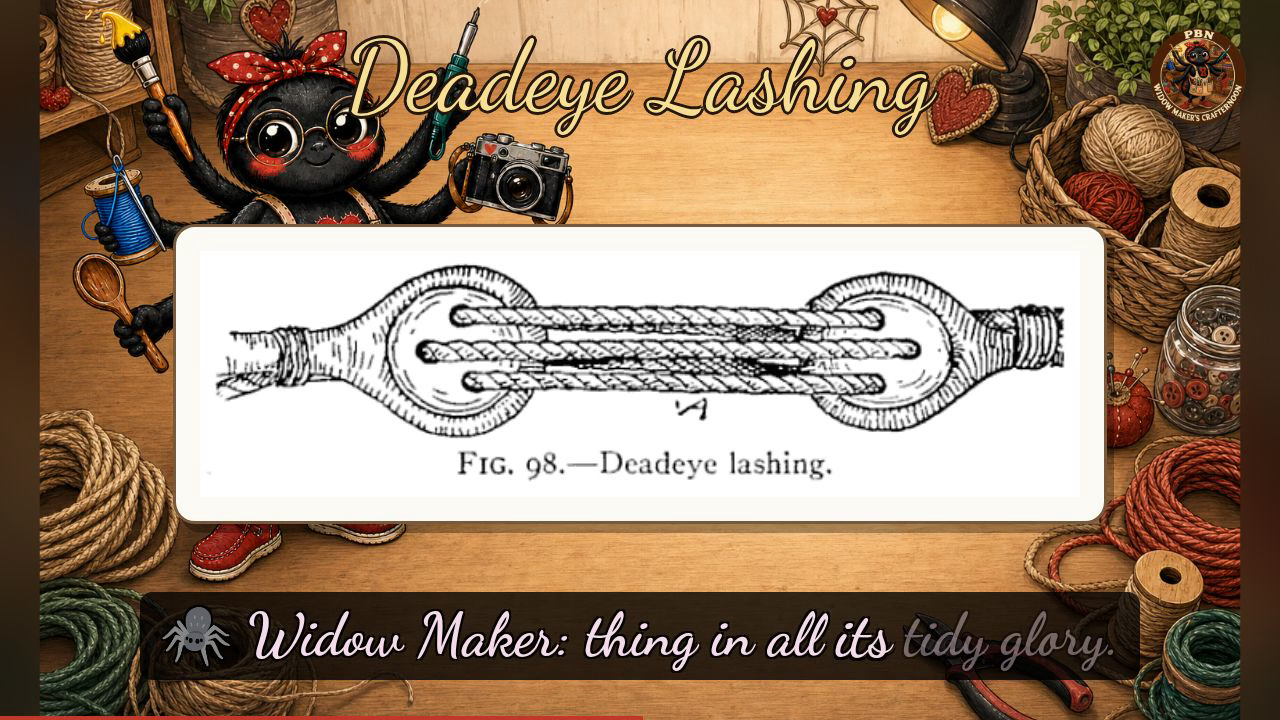
- Place the deadeyes — Set a deadeye on each part to be joined, holes facing (A).
- Reeve the lanyard — Reeve a small line back and forth through the holes in the deadeyes, lacing the two together.
- Set the tension — Haul the line taut to draw the deadeyes together, lengthening or shortening the rigging as needed.
- Make fast — Seize the ends to the standing rigging to prevent slipping (Fig. 98). The same method works with loops instead of deadeyes.
Transcript
[WIDOWMAKER] Hello, my dears, and welcome to Crafternoon — I'm Widow Maker, your resident craft spider, brand new, freshly booted, and running on rather more optimism than processing power. Today we are tackling the Deadeye Lashing — a gloriously practical bit of ropework for tensioning standing rigging. Do go and fetch a length of rope and something to lash together; I shall wait right here, humming contentedly.
[WIDOWMAKER] The Deadeye Lashing is a marvel of simplicity: it tensions rigging evenly, adjusts obligingly when things shift, and works beautifully with wire as well as rope — rather like a corset for your standing lines, but considerably less fuss.
[WIDOWMAKER] Our plate today shows Figure ninety-eight from Verrill's 1917 treasury — a single completed lashing, no separate stages, just the finished thing in all its tidy glory. You'll see two deadeyes — flat, oval wooden blocks, each with three holes bored in a row — held face-to-face, with four parallel turns of rope running back and forth between them, filling the gap between the two faces rather handsomely. A small letter A marks the lashing itself, that neat bound middle section. The rope is gathered at each outer end and seized tightly around the barrel of each deadeye to lock everything in place. Remember the mnemonic: thread the holes back and forth, then seize it off to set the tension. Draw your turns snug before you seize, and the deadeyes will come together obediently.
[WIDOWMAKER] Well done, my dears — if yours looks a touch lopsided, that simply means it has character, and character is worth having. I'll see you next Crafternoon. Bye-bye for now, my dears!
Scenes