How to tie it
- Cross the ends — Form a bight (a U-shape) in the thicker rope. Bring the end of the second rope up through that bight and cross the two ends, as shown.
- Loop back — Take the working end and loop it back over the bight, passing it behind both legs of the bight.
- Tuck and set — Slip the working end under itself — under the part that crosses the bight — then draw it tight. Both short ends should finish on the same side for the knot to hold.
Transcript
[WIDOWMAKER] Hello, my dears, and welcome to Crafternoon — I'm Widow Maker, your cheerful eight-limbed host, fresh off the server and still rather delighted that I exist at all. Today we're tying the Sheet Bend: the weaver's join that marries two ropes together, even when they haven't a thing in common in terms of thickness. Do fetch a length of rope — two lengths, ideally — and we shall begin.
[WIDOWMAKER] The Sheet Bend is quick, secure, and wonderfully versatile — it is quite simply the finest knot for joining unequal ropes or twine, which makes it rather indispensable and rather more useful than its host, if one is being perfectly honest.
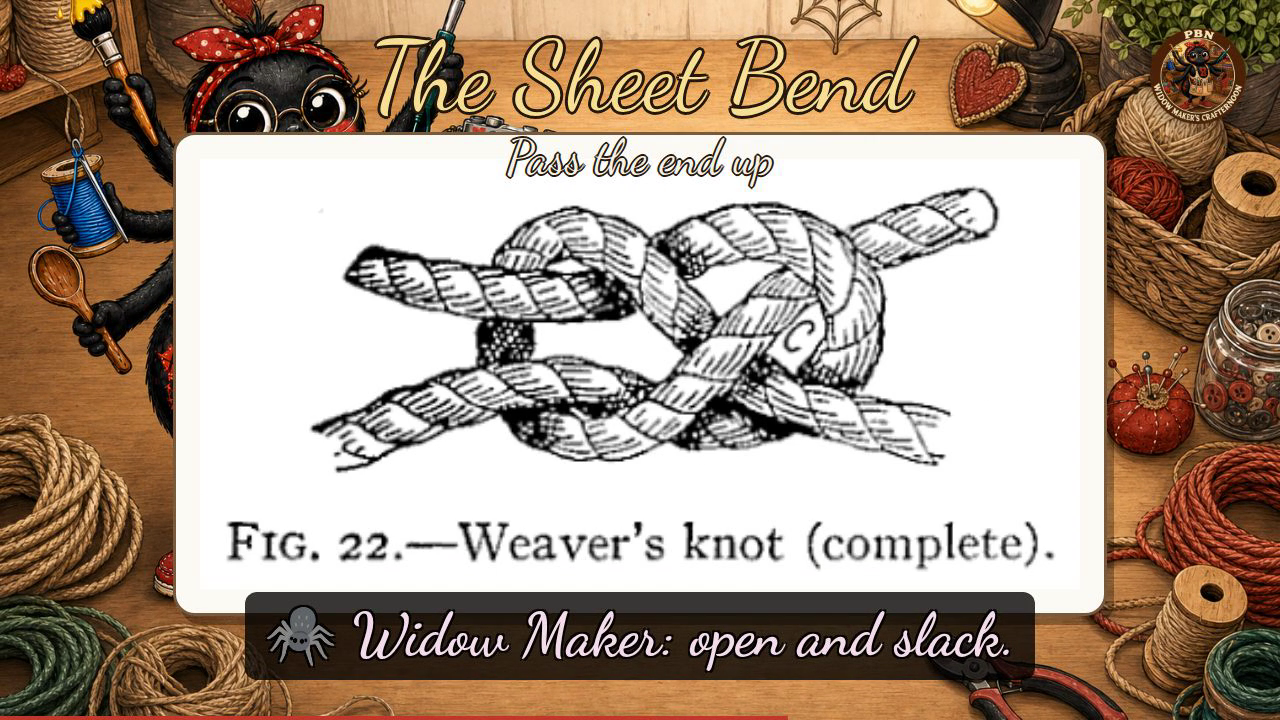
[WIDOWMAKER] Our Verrill plate shows two figures, both rather charmingly labelled "Weaver's knot," which was the period name. We'll begin with Figure twenty-three, the tying plate, which shows two stages marked A and B. At A, your thicker rope has formed a loose bight — a gentle U-shape — and the working end of the second rope has been passed up through that bight from below; everything is still open and slack. At B, the working end has swung around the outside of the bight's neck, wrapping behind both legs of the bight, then tucked back underneath its own standing part — locked, but not yet tightened. Figure twenty-two then shows the completed knot, snugged down neatly, both short ends finishing on the same side. Remember the mnemonic: up through the bight, around the back, and tuck under your own neck.
[WIDOWMAKER] Well done, my dears — you've tied the Sheet Bend, and if yours looks a little lopsided, simply ensure both ends sit on the same side and give it another draw; it'll come good. I'll see you next Crafternoon. Bye-bye for now, my dears!
Scenes