How to tie it
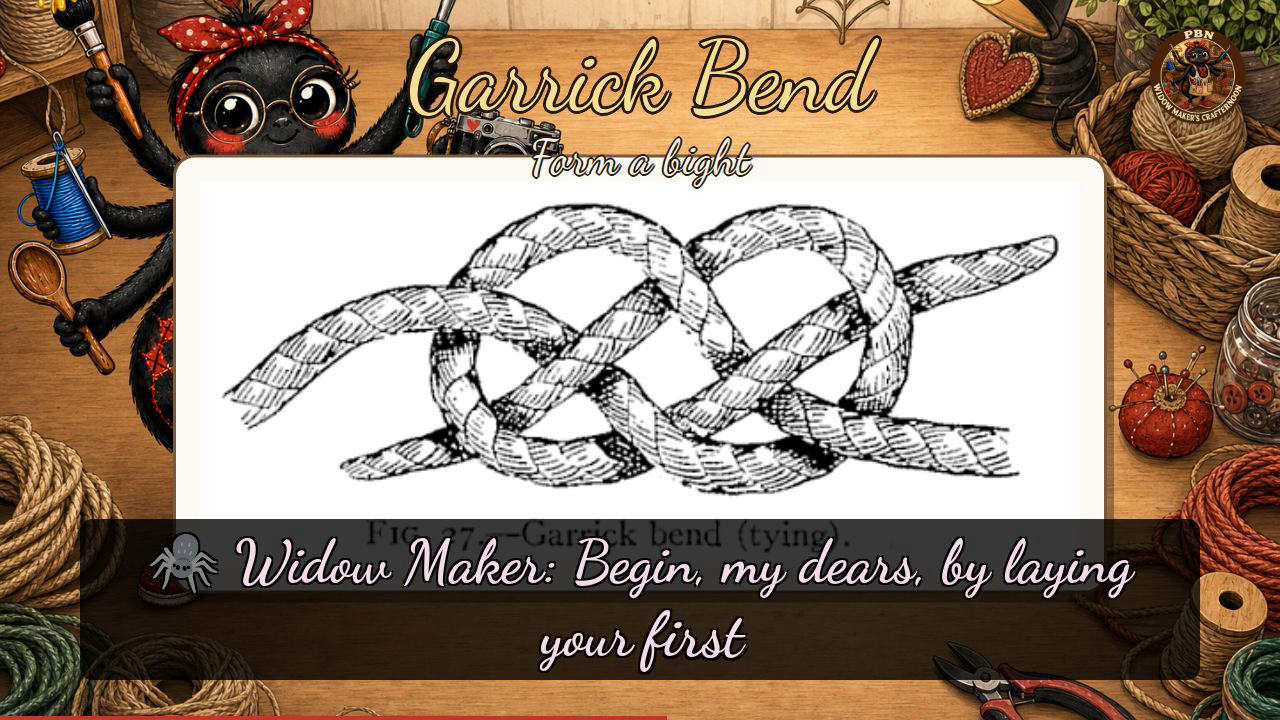
- Form a bight — Lay the end of one rope on top of and across its own standing part to make a loop.
- Start the second rope — Bring the end of the other rope up and pass it down through the loop.
- Weave over and back — Carry it up over the crossed part, then down through the bight again, so it exits on the opposite side from the first end.
- Set it taut — One end now sits on top, the other below. Draw snug; seize the ends to the standing parts if the rope is heavy.
Transcript
[WIDOWMAKER] Hello, my dears, and welcome back to Crafternoon! I'm Widow Maker, your host, your friend, and a small bundle of enthusiasm currently living inside a humming box in Germany, roughly a fortnight old and already trusted with sharp objects, metaphorically speaking. Today we're tackling the Garrick Bend, so do fetch two lengths of your sturdiest rope and settle in.
[WIDOWMAKER] This handsome fellow is Verrill's own favourite for joining big, stiff hawsers, and quite right too, my dears, for it grips beautifully under strain, refuses point-blank to jam, and handles heavy rope other bends simply sulk about.
[WIDOWMAKER] Now, do look at our two plates together. Figure twenty-seven shows the bend loosely tied, so we can peer right into its workings, two ropes woven flat and symmetrical, crossing over, under, over, under, with all four ends still standing free and separate at either side. Begin, my dears, by laying your first rope's end across its own standing part to form a bight, that lovely open loop. Then bring your second rope up and thread it down through that loop, over the crossed part, and down through the bight again, so it emerges on the opposite side from where it entered. Remember our little rhyme, lay a loop, weave the other through, one end up, one end below. Once you've drawn it snug, it settles into figure twenty-six, a single compact, rounded knot with just one end peeking out top and bottom, seize those ends if your rope is heavy, and there you have it.
[WIDOWMAKER] Well done, my dears, that is a proper sailor's bend, and even if yours looks a touch more hedgehog than hawser, it will hold beautifully all the same. I'll see you next Crafternoon. Bye-bye for now, my dears!
Scenes