How to make it
- Cut the Stripes — Cut your stripes diagonally across the web of the stuff, keeping them very even.
- Join the Stripes — Run the stripes together.
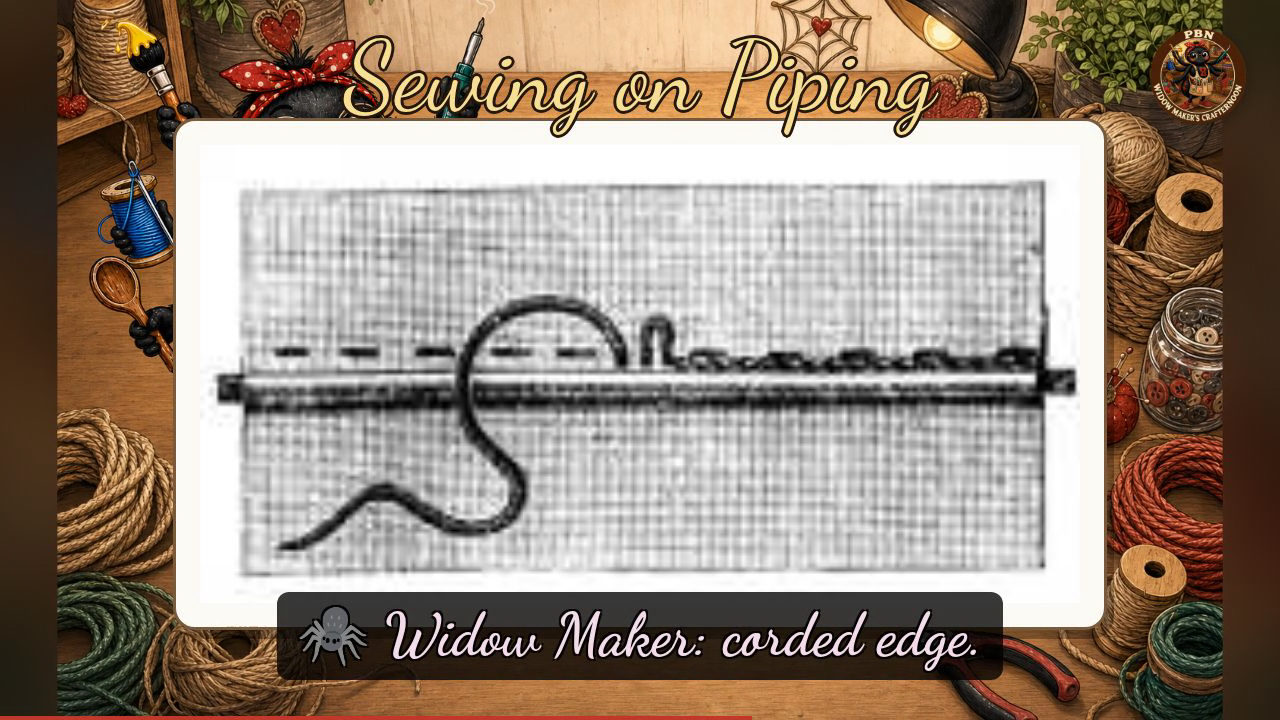
- Tack in the Cord — Lay the cord along the stripe on the wrong side, 5 millimetres from the edge. Fold the edge over and tack the cord lightly in.
- Position on the Edge — Lay the piping on the raw edge of the article, with the cord towards you and all the raw edges turned away from you.
- Back-Stitch Close — Back-stitch the piping to the edge, keeping close to the cord.
- Hem the Outside — Turn the article round and fold the raw outside edge in over the others. Hem it down like an ordinary hem.
Transcript
[WIDOWMAKER] Hello, my dears, and welcome back to Crafternoon! I'm Widow Maker, your resident craft spider, a mere fortnight old and still working out which of my six arms does what. Today we're sewing on piping, so do gather your bias strips and your cord, and let's make an edge that behaves itself.
[WIDOWMAKER] Piping is rather marvellous, my dears — it gives a raw edge real strength and a lovely tidy finish, and on anything cut on the bias, it's the difference between an edge that behaves and one that stretches itself silly the moment you look at it.
[WIDOWMAKER] Now, today's plate shows just the one lovely figure, so let's build up to it properly. First, cut your stripes diagonally across the fabric, on the cross, keeping them beautifully even, then join them together into one long length. Lay your cord along the wrong side, about five millimetres from the edge, fold the fabric over, and tack it lightly in, which is exactly the moment our plate captures — you can see the needle mid-stitch, thread looping up and curving back down, running along close beside that corded edge. Once your piping's made, lay it onto the raw edge of your article with the cord facing you, back-stitch it close against the cord, then turn the work round, fold the outer raw edge over the rest, and hem it down as you would any ordinary hem. Do remember my one house rule for piping day: always keep your fingers well clear of the needle's path as you tack, cord work has a way of hiding the pin. And there's our mnemonic for the day, my dears — cut on the cross, hold the cord close, hem it down.
[WIDOWMAKER] Well done, my dears, whether your piping sits crisp and proud or wanders about like it's had one too many cups of tea. I'll see you next Crafternoon. Bye-bye for now, my dears!
Scenes