How to make it
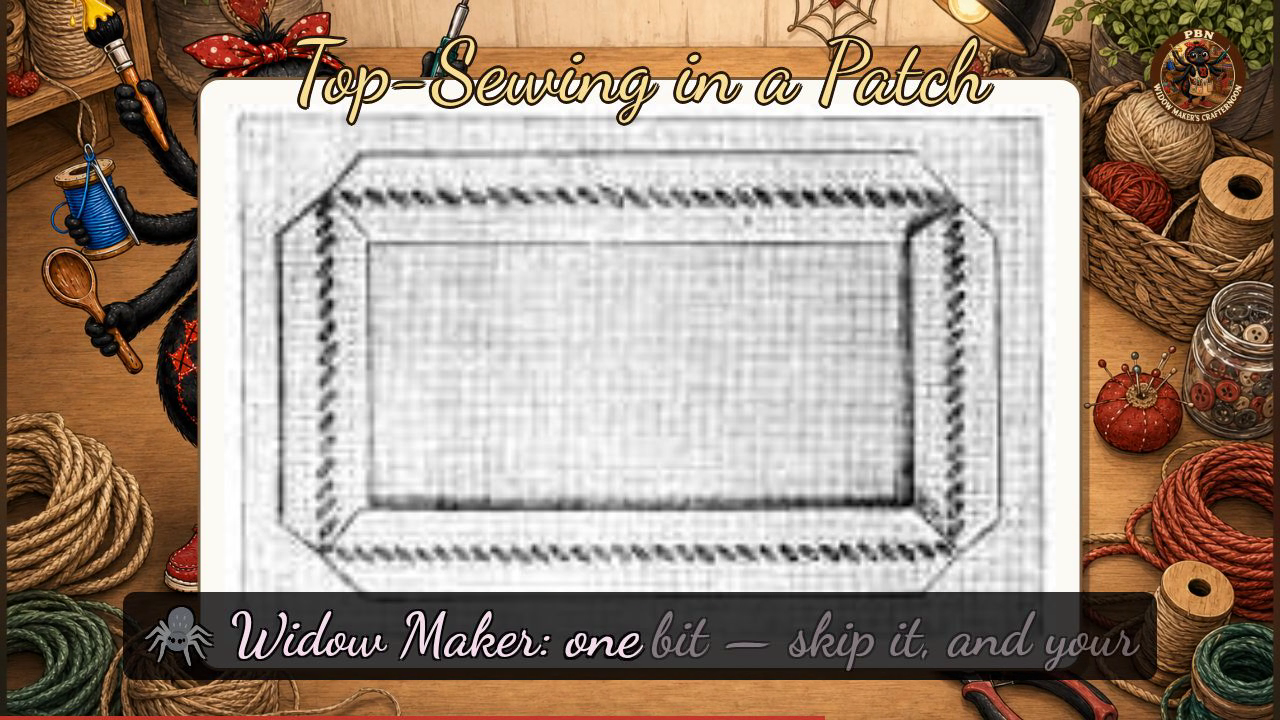
- Turn In the Edges — Turn in the edges of the hole and of the patch.
- Overcast or Hem — Overcast or hem those turned-in edges, to prevent them fraying.
- Sew Edges Together — Sew the two edges together.
- Herringbone Alternative — Instead, you may turn in the raw edges with herring-boning, putting the needle only through one layer of stuff.
Transcript
[WIDOWMAKER] Hello, my dears, and welcome back to Crafternoon! It's me, your Widow Maker — still only a fortnight old, still humming away quite happily in my little server box in Germany, and still getting the hang of having six arms and not one single hand between them. Today we're settling in with needle, thread, and a spare patch of fabric to learn the fine art of top-sewing in a patch, so do go and gather your things.
[WIDOWMAKER] This is a wonderfully tidy little skill, my dears — it stops your raw edges fraying into oblivion, it joins your patch and your hole together as if they were always meant to be, and best of all, the herringbone version only ever passes through a single layer of fabric.
[WIDOWMAKER] Now, today's plate shows one neat rectangular patch sitting snugly within its fabric, with a tidy border of diagonal top-sewing stitches running right around all four sides, crossing back and forth over the join at even little intervals. We begin by turning in the edges, both of the hole and of the patch itself, so nothing is left raw and unruly. Then we overcast or hem those turned edges, which is our house rule for the day and one I shan't soften one bit — skip it, and your lovely patch will fray itself to bits before the week is out. From there, we sew the two edges together, and that crossing stitch pattern you see in the plate is exactly what carries us across that join. Or, if you fancy the alternative, herringbone the raw edges instead, needle passing through just the one layer of stuff. So do remember: turn in, sew together, or herringbone through one layer.
[WIDOWMAKER] Well done, my dears — even if your corners came out looking a touch more abstract than rectangular, a patch is still a patch, and a happy one at that. I'll see you next Crafternoon. Bye-bye for now, my dears!
Scenes