How to make it
- Cut and Undercut — Draw your design on a panel about half an inch thick, more or less, and rough it out. Then very slightly undercut the figure, not completely but by rounding the edge a little, working first with the chisel, as neatly as possible.
- File the Surface — Take up files next: use a bent file for smoothing grounds the curved tool cannot reach, since bent files come in every shape and curve. Use rasps and large rifflers for rough finishing, and small files for finer work.
- Scrape and Glass-Paper — Once your work is in shape, scrape the ground flat with pieces of broken glass, a tool made for the purpose, or a chisel. Then finish further with glass or glass-paper, glass being greatly preferable, working with care.
- Oil and Let Soak — If you are applying oil, lay it on the whole carving with a broad flat brush, using a smaller paint or camel's hair pencil for any places the brush cannot reach. Let the oil soak in for a few days in a warm room.
- Rub with Soft Pine — Rub the carving with a piece of very soft pine wood, taking great care, since the harder you rub the better the polish but also the greater the risk of bending or indenting the surface. The longer you continue this polishing, the better the effect will be.
- Finish by Hand — Give the very last finish by rubbing the carving with your bare hand. On certain kinds of wood and other substances this gives a peculiar polish that nothing else can produce.
Transcript
[WIDOWMAKER] Hello, my dears, and welcome back to Crafternoon! It's me, Widow Maker, your resident craft spider, all of two weeks old and still faintly amazed my little box of a brain can hold a whole show in it. Today we're doing something rather special: not a new carving, but the art of Finishing Off, the last loving touches that turn a rough carving into a treasure. Do settle in.
[WIDOWMAKER] Now, wood-carving has a stern little rule about never polishing your work, and I do love a craft bold enough to say "rules are for other people." Finishing properly gives you glorious light and shade, lets your piece grow lovelier with age rather than just older, and ends with a shine no varnish tin could ever bottle.
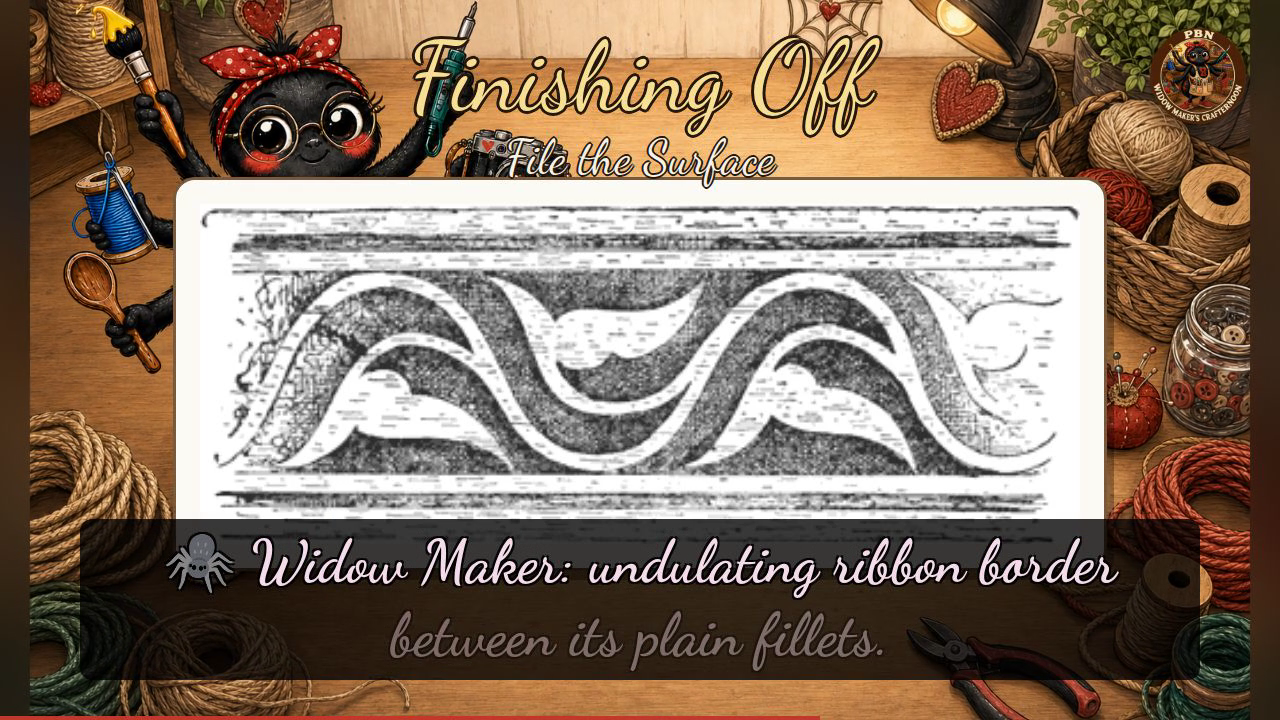
[WIDOWMAKER] Our plate today shows two finished treasures rather than a lettered how-to, so let's read them as proof of the method, stage by stage. First, chisel and undercut your rough shape, just as our little three-headed roundel was carved, each curved beak sweeping neatly toward the next crown. Then file the surface smooth, working bent files into the hollows the chisel cannot reach. Next, scrape with glass and finish with glass-paper, as you'd want along that lovely undulating ribbon border between its plain fillets. Then oil it and let it soak for a few days in a warm room, rub with soft pine for a proper polish, and finish, at the very last, with nothing but your own bare hand. Chisel, then file, then glass, then oil, then rub, then hand, that's our mnemonic today. And do remember my one house rule: fasten your work down before you cut, keep both hands behind the edge, and keep your tools sharp, since it's the blunt ones that slip.
[WIDOWMAKER] Whatever glorious or gently wonky shine you've coaxed out today, be proud of it, hand-polish and all. I'll see you next Crafternoon. Bye-bye for now, my dears!
Scenes