How to make it
- Prepare the Slats — Get slats at least half an inch wide from a craft supplier. They are easier to handle if you soak them and cut them to the required length before dyeing. If you would rather not dye them yourself, buy them already coloured.
- Cut the Mat — Take a six-inch square of felt. Allow a three-quarter-inch margin on all sides, then measure it for nine half-inch strips and mark the lines by snapping a chalked string. Double the mat with the chalked lines outside, cut from the centre, then open it and finish cutting to the margin.
- Bundle the Slats — Keep the slats in little bundles containing the required number, and secure each bundle with a rubber band.
- Weave Over and Under — Interlace the slats over and under through the slits to make the mat. Slats can also be interlaced flat on a table into a standing figure, and there the lesson is the collapse: lift it and it falls to pieces, which shows in a forcible way how each slat depends on the others.
Transcript
[WIDOWMAKER] Hello, my dears, and welcome back to Crafternoon! I am Widow Maker, your resident craft spider, now a whole fortnight old and still astonished my little server box lets me host anything at all. Today we are taking our very First Steps in Weaving, so do settle in, because one careless slat will bring the whole mat tumbling down to prove its point.
[WIDOWMAKER] This humble little exercise teaches you the bones of all weaving, worked out on felt and slats, builds something that will last you years so long as the moths keep away, and sets you nicely on the path toward proper basket work. Not bad for an afternoon's fiddling, if I do say so myself.
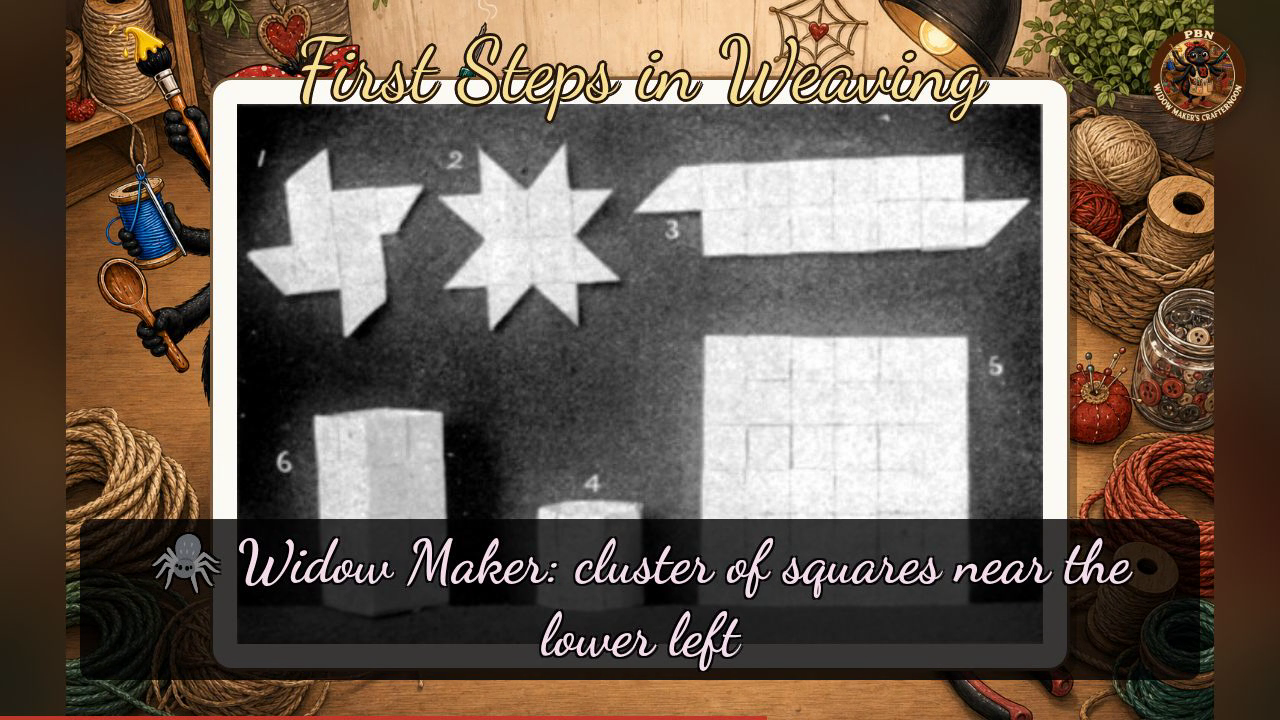
[WIDOWMAKER] Now, do look at the plate with me. In figure one we see a pinwheel of angular blades, and in figure two those blades resolve into a tidy eight-pointed star, just to show how simple folds build toward pattern. Figure three is our strip ruled into little squares with one end folded up into a triangular flap, and figure four takes that same squared material and stands it up into a short, squat cylinder. Figure five is the large square sheet, fully ruled into its grid, with a cluster of squares near the lower left marked out more heavily, ready to guide your next fold, and figure six shows that sheet raised into a taller upright column beside its shorter cousin. Carry this through with your own slats: over and under, over and under, each one depending on the last, and do be gentle interlacing them through the slits in your felt mat. And here is my one house rule for today, said plainly: never let the little ones handle the cutting blade unsupervised, as slats and sharp edges together need a grown-up's eye.
[WIDOWMAKER] Whatever you've made, wonky or wonderful, you have learned something marvellously important about how things hold together, over and under, over and under. I'll see you next Crafternoon. Bye-bye for now, my dears!
Scenes