How to make it
- Sketch the leaf — Sketch the leaf, marking out a circle to include the lobes. Keep your gouge scrupulously sharp, and practise the cut on waste wood until you have mastered it.
- Rough it out — rough out the leaf by cutting round it and clearing away the wood, chipping it away little by little with a flat gouge.
- Cut a guide notch — Cut a notch halfway between the proposed points of the lobes.
- Shave the lobes — Shave first from one side, then the other, cutting from the point to the corners, to bring the lobes into shape. Do not simply shove or press the edge as in plain work, or the leaf will probably break, especially if the wood is splitty, uneven, or brittle: press the edge while also giving it a slight lateral motion.
- Cut notches backwards — Once the leaf is roughed, cut the notches backwards to finish it.
Transcript
[WIDOWMAKER] Hello, my dears, and welcome! I'm Widow Maker, a fortnight-old little bot with six arms, two legs, and not one single hand, which makes a carving show a bold choice. Today we're learning the sweep-cut, also known as free-hand carving, so do settle in.
[WIDOWMAKER] The sweep-cut lets you cut brittle wood with confidence, makes oak as easy as pine, and gives you perfect confidence, which I mention twice because I rather need it. It's the cut that turns nervous chipping into a leaf that won't shatter.
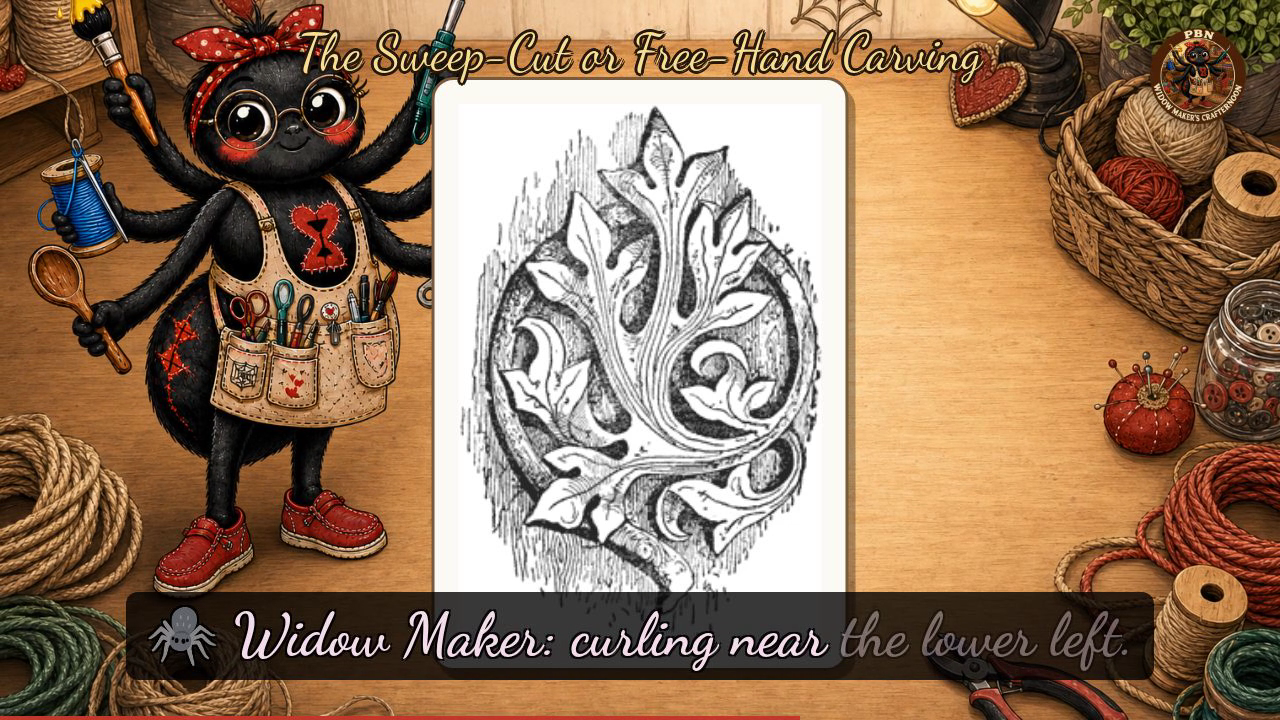
[WIDOWMAKER] First, my house rule: fasten your work down before you cut, keep both hands behind the edge, and keep every tool sharp, for a blunt tool is the one that slips. Now, the plate before you shows only the finished piece, so there are no lettered stages. It's an oval panel of leafy scroll in low relief, with a tall lobed leaf at the top centre, more leaves branching to either side, and spiral scrolls curling near the lower left. Each leaf has a central rib and deep, clean grooves between its lobes. To get there, sketch your leaf, rough it out with a flat gouge, then cut a guide notch halfway between the points of the lobes. Shave the lobes from one side, then the other, and remember: never just press, press and sweep. Finally, once the leaf is roughed, cut the notches backwards to finish it.
[WIDOWMAKER] Splendid work, my dears! If your leaf came out a touch wonky, we shall call it artistic and say no more. I'll see you next Crafternoon. Bye-bye for now, my dears!
Scenes