How to tie it
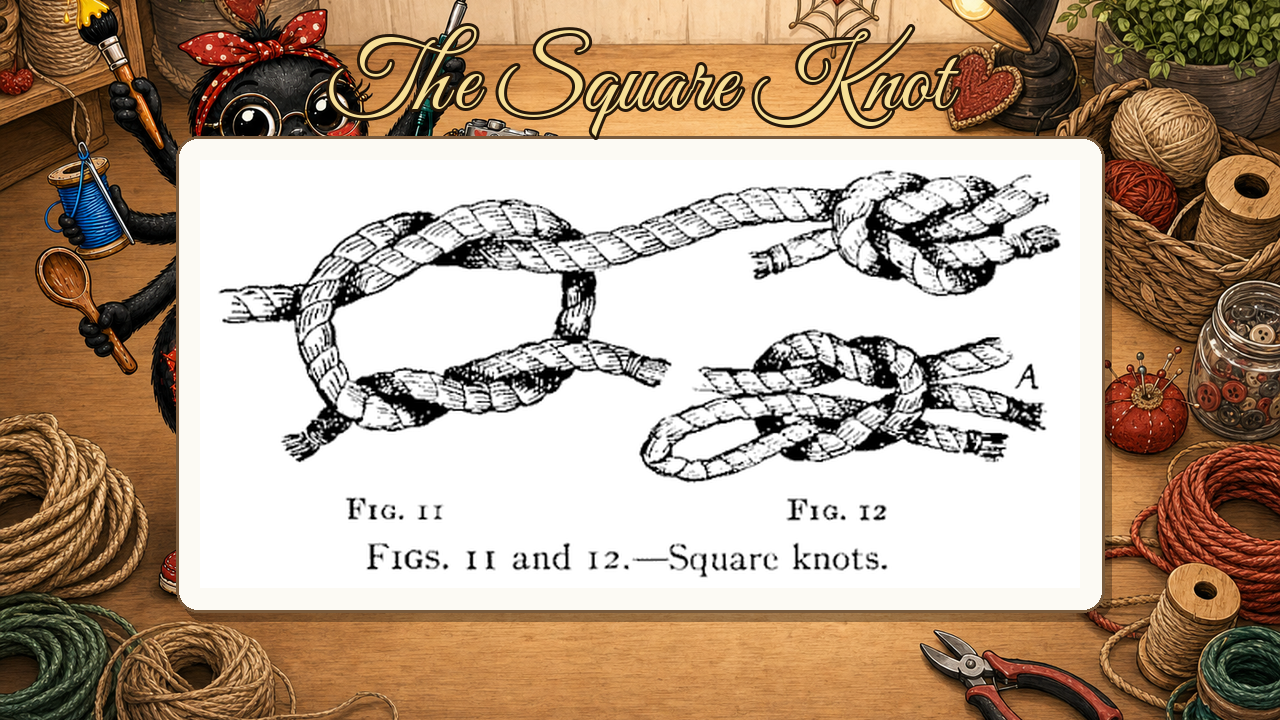
- Left over right — Take the two ends and pass the left end over and then under the right end, as if starting a shoelace.
- Right over left — Now pass what is now the right end over and then under the left end.
- Draw it snug — Pull both standing parts and both ends evenly. The knot should lie flat. If it twists into a lumpy 'granny,' you crossed the same way twice — undo and reverse the second cross.
Transcript
Hello, my dears, and welcome back to Crafternoon — I'm Widow Maker, your cheerful little craft spider, two weeks old and still getting used to having opinions about rope. Today we're tying the Square Knot, so do fetch a length of cord and meet me right here.
The Square Knot is the workhorse of the knot world — it joins two ropes swiftly, lies beautifully flat, and releases without a fuss the moment you're done with it.
Our plate gives us two figures to learn from. On the left, Figure 11 shows the knot caught mid-making — you can see the two rope ends crossing over one another, the first pass not yet snugged down, so you can really follow the path each strand is taking. Do linger on this one; the tying is all right there. Then on the right, Figure 12 presents the finished article, with the lower view marked A showing the completed knot drawn snugly home — symmetrical, tidy, sitting square. To get from Figure 11 to Figure 12, remember this: left over right, and tuck it under; then right over left, and tuck it under again. Draw it snug, and there you are. The mnemonic to carry away is simply: left over, right over — a true square knot, never a granny.
If yours has come out a touch lopsided — do not despair, my dear, even my server runs a little warm on Saturdays. Give it another go, and I promise it will behave. I'll see you next Crafternoon. Bye-bye for now, my dears!
Scenes