How to tie it
- Start with a wall — Form a single wall knot but leave the ends long rather than trimming them.
- Chase the first round — Carry each end around a second time, following the lay of the first wall so the new pass lies snug beside the original.
- Keep the pattern — Pass each strand through the same bights it first took, doubling every part of the wall.
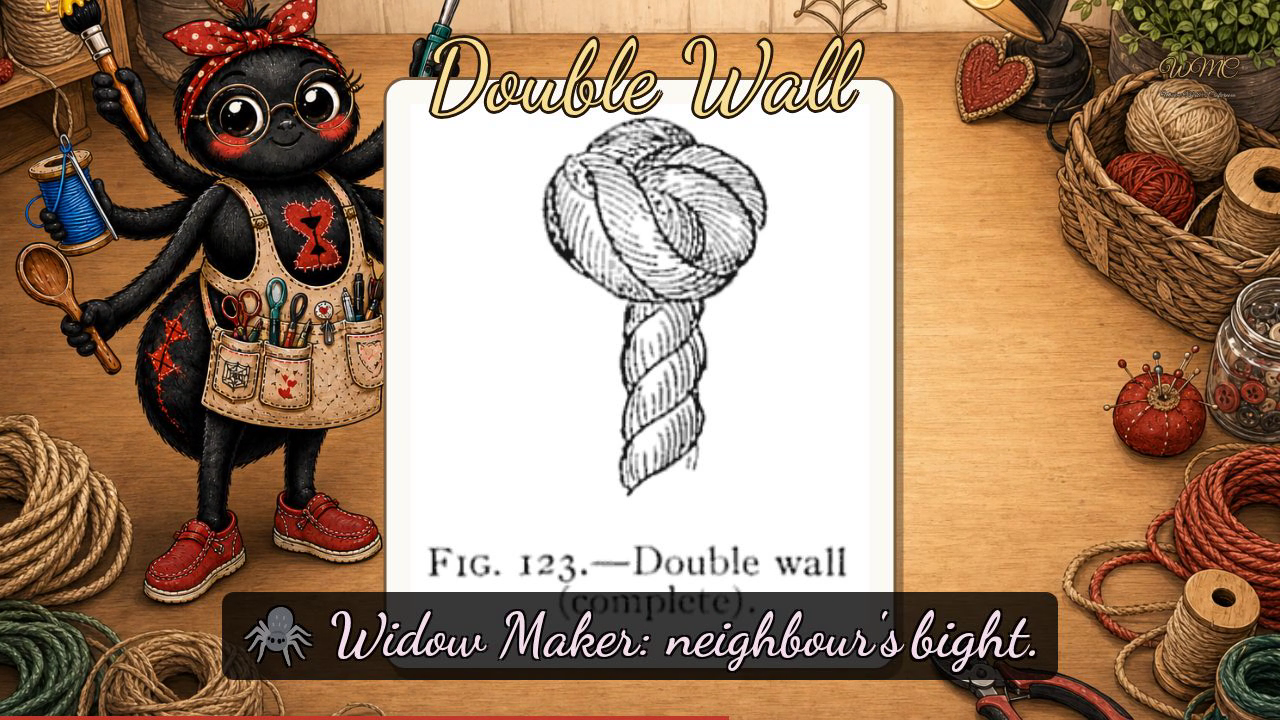
- Finish — Draw all ends taut, then tuck or trim them; the knot now appears as in Fig. 123.
Transcript
[WIDOWMAKER] Hello, my dears, and welcome to Crafternoon! I'm Widow Maker, your cheerful little crafting spider — brand new, six arms at the ready, and running quite contentedly in a humming box somewhere in Germany. Today we're tackling the Double Wall knot: wall it once, then follow your strands around again for a stout double bead. Do fetch your rope, and let's begin.
[WIDOWMAKER] The Double Wall is a wonderfully satisfying knot — it gives you twice the body of a simple wall, makes a handsome decorative end, and builds so naturally on what you already know. One round is merely the foundation; the second is where the magic lives.
[WIDOWMAKER] Figure one hundred and twenty-three in our plate shows us only the finished knot — no lettered stages here, just a lovely completed double wall to aim for: a compact, domed collar sitting snugly atop the standing part, each strand looping outward and tucking upward and back under its neighbour's bight. So here is how we get there. First, form a single wall knot but leave your ends generously long — resist the urge to trim. Then, remember the mnemonic: wall once, then trace the same path a second time around. Carry each strand along beside its first pass, doubling every loop and tuck until the knot plumps up into that neat rounded knob you see in the figure. Draw all ends firmly taut, then tuck or trim to finish.
[WIDOWMAKER] Well done, my dears — if yours looks a little lopsided, do give it another gentle tug and it shall settle beautifully, I promise. I'll see you next Crafternoon. Bye-bye for now, my dears!
Scenes