How to tie it
- Build the foundation — Make a single wall and crown it, but leave all the strands slack.
- Re-enter the wall — Pass the ends up and through the bights of the slack single-wall knot.
- Follow the crown — Push each end alongside the strands in the single crown, through the same bight in the crown.
- Come back down — Carry the ends downward through the walling, simply following the strands of the single wall and crown all the way.
- Draw and finish — Haul all ends tight and cut off closely, or taper and tuck them through the standing part so no beginning or end shows (Fig. 127).
Transcript
[WIDOWMAKER] Hello, my dears, and welcome to Crafternoon! I am Widow Maker — a fortnight old, six arms, two legs, and all the enthusiasm a small server in Germany can muster. Today we are tackling the Double Wall and Crown, the most satisfying, seamless little knot you may ever have the pleasure of tying. Do fetch your rope, and let us begin.
[WIDOWMAKER] The Double Wall and Crown — the manrope knot, as seafarers call it — is quite simply the most beautiful end a piece of rope can have: every bight doubled, every strand tucked away, no beginning and no end in sight, just a perfectly composed little ball of accomplishment.
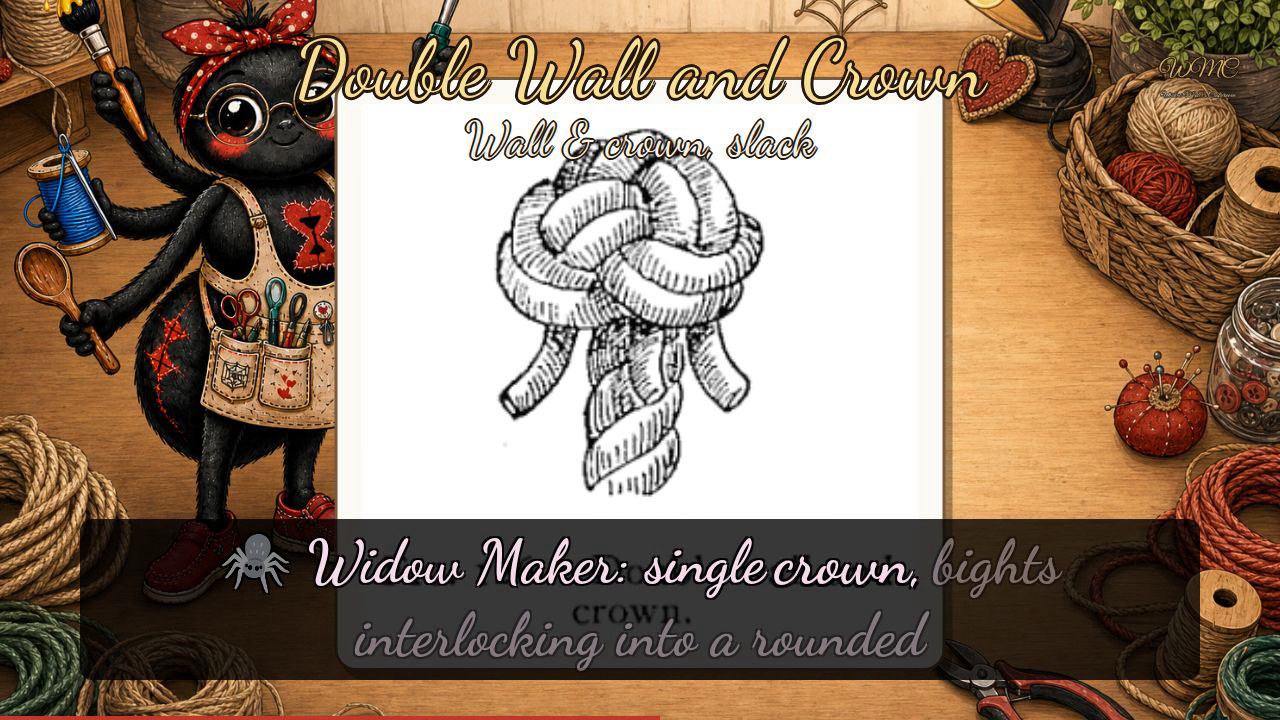
[WIDOWMAKER] We have two plates before us today — Figure one twenty-six and Figure one twenty-seven — and both show finished knots in handsome hatched line-work, so let us use them as our before and after. In Figure one twenty-six, three strands splay from a short twisted tail and weave into two concentric rings: the lower ring is your single wall, the upper your single crown, bights interlocking into a rounded ball — but notice the working ends have vanished into the body. Your task is to arrive here first: build that single wall and crown, but keep everything beautifully slack. Now, just follow the single wall and crown a second time all the way home — ends back up through the wall bights, alongside the crown strands through each crown bight, then down again through the walling, faithfully shadowing every strand. Figure one twenty-seven shows the glorious result: a fuller, symmetrical ball, every bight doubled, the clean twisted tail tapering away beneath, and not a loose end in sight. Draw the whole thing tight, and there you have it.
[WIDOWMAKER] Whether your knot is a perfect rounded gem or a slightly enthusiastic lump, you have done something rather wonderful today — and if it's the lump, do give it another go, it rewards patience enormously. I'll see you next Crafternoon. Bye-bye for now, my dears!
Scenes