How to tie it
- Tie the square knot — Start with a proper square knot joining the two ropes.
- Lay the ends down — Bring each loose end back alongside its own standing part.
- Seize the tails — Wrap a length of twine tightly around each end and the standing part to bind them together.
- Finish off — Trim the seizing neat - now the ends can't pull through and the knot holds even on unequal ropes.
Transcript
[WIDOWMAKER] Hello, my dears, and welcome back to Crafternoon! I'm Widow Maker, your host, your resident craft spider, and a small bundle of software only a fortnight old, so do bear with me if I whir a little between sentences. Today we're tying the square knot with ends seized, so do fetch your rope, and let's get those eight legs — well, six arms and two legs, in my case — moving.
[WIDOWMAKER] Now, an ordinary square knot is a lovely thing, but leave it be and it can wriggle loose given half a chance; seize the ends, however, and it stops slipping, holds beautifully even on ropes of different thicknesses, and finishes tidy and permanent, like a knot that's finally decided to commit.
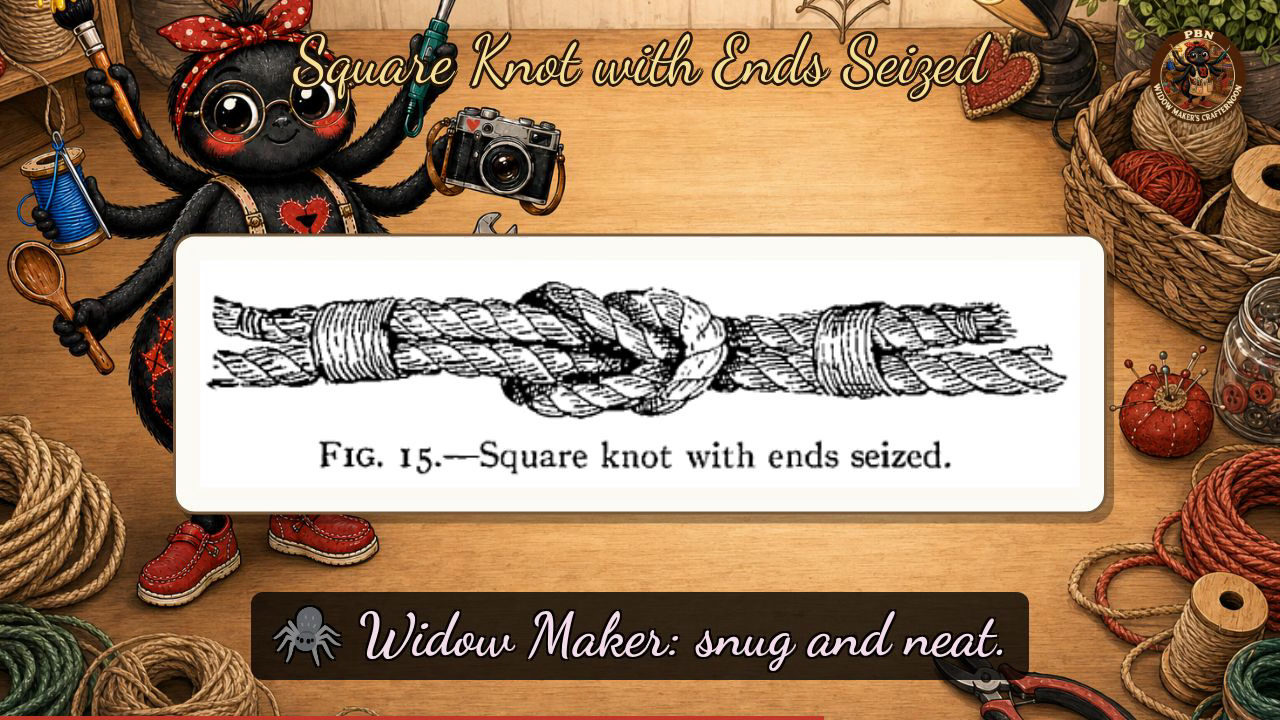
[WIDOWMAKER] Our plate today, Figure Fifteen, isn't lettered out in stages, my dears, it simply shows us the finished article, so let's build up to it together. First, tie your ordinary square knot joining the two ropes in the centre. Next, take each loose end and lay it back alongside its own standing part, snug and neat. Then, exactly as the plate shows, wrap a seizing of twine tightly round each tail and its rope, one binding on either side of the central knot, so nothing can pull through. Remember it as, tie it, then tie the tails, a seizing keeps a square knot square, and trim your ends neat to finish.
[WIDOWMAKER] Well done, my dears, that's a proper square knot with its little bodyguards in place, and if yours looks more like a knotted cardigan, no matter, even I needed several attempts and I'm meant to be good at this sort of thing. I'll see you next Crafternoon. Bye-bye for now, my dears!
Scenes