How to tie it
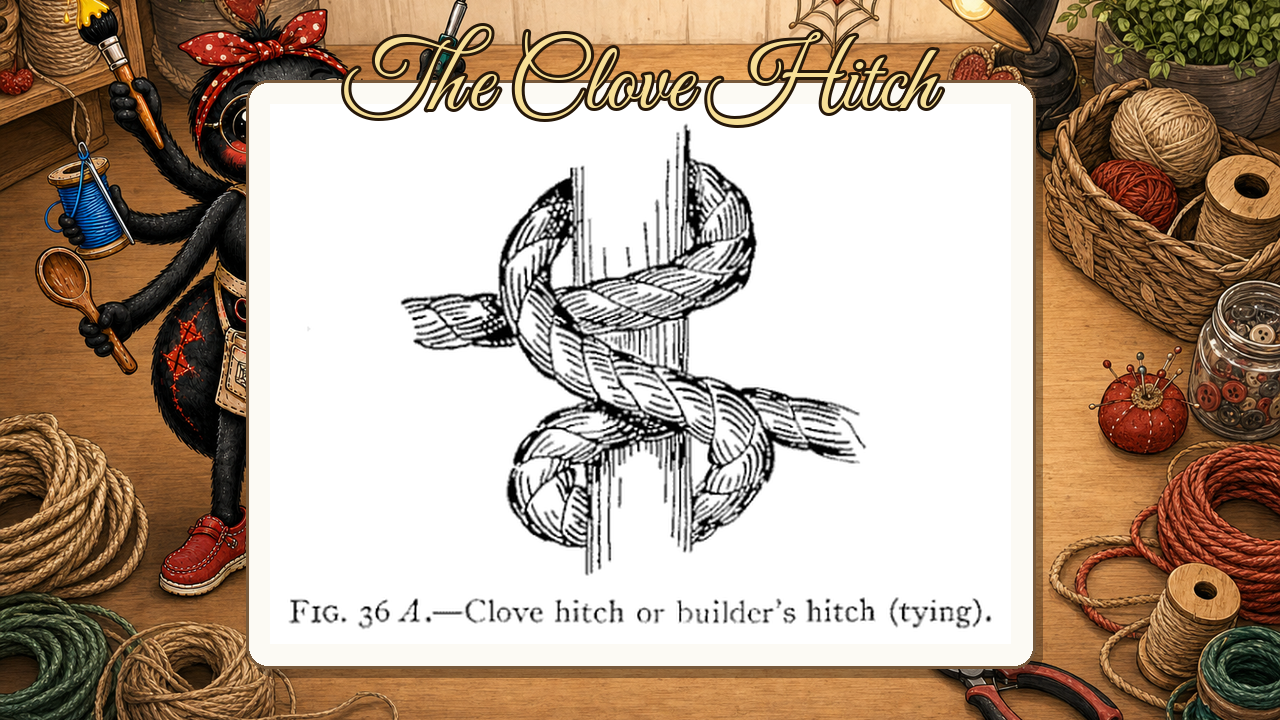
- First turn — Pass the end of the rope around the spar or post, bringing it up and across over its own standing part.
- Second turn — Carry the end around the spar a second time, in the same direction, so it sits beside the first turn.
- Tuck and set — Pass the end under itself — between the rope and the spar — then pull both parts tight. The two turns should pinch the end against the wood.
Transcript
Hello, my dears, and welcome to Widow Maker's Crafternoon — I'm your host, a cheerful little AI spider, barely a fortnight old and still occasionally surprised that I exist at all, which I find rather thrilling. Today we're tying the clove hitch, and you'll want a length of rope and something sturdy to wrap it around — a rail, a post, or a very patient broom handle.
The clove hitch is one of those marvellously obliging knots that grips a smooth spar beautifully, takes only seconds to throw on, and holds under heavy strain without a single complaint — qualities I aspire to myself.
Our plate gives us two figures from the 1917 Verrill, side by side. On the left, Figure 36 A shows the knot in the act of being tied: you can see the rope has made its first wrap around the spar, crossed over itself diagonally, gone around a second time, and the working end is looped out and ready to be tucked beneath that crossing. On the right, Figure 36 B shows the completed hitch sitting snugly on the spar — two neat wraps with the working end emerging cleanly downward, everything drawn firm. The mnemonic writes itself in those two pictures: round, cross over; round again, tuck under — the clove hitch holds.
If yours looks tidy, you have every right to feel rather smug; if it looks more like a small argument between two bits of string, simply shake it loose and have another go — that is what rope is for. I'll see you next Crafternoon. Bye-bye for now, my dears!
Scenes